
The 3MF (3D Manufacturing Format) has become one of the most modern and flexible formats in additive manufacturing. It can store not only the geometric mesh of your model, but also materials, textures, colors, print parameters, and metadata – all neatly packaged inside a compressed ZIP-based container.
However, despite its advantages, many 3D printers and slicing tools still rely on the STL format. STL remains the simplest and most widely supported geometry-only standard in 3D printing. For this reason, converting 3MF to STL is a frequent and necessary step in many production and prototyping workflows.
In this tutorial, we’ll look at how reaConverter processes 3MF files, how to control the conversion quality using Level of Detail, and how to export clean STL files ready for slicing.
Why Convert 3MF to STL?
There are several common reasons to convert 3MF files to STL:
- Printer or slicer compatibility: A number of consumer and older industrial 3D printers still do not fully support 3MF. STL guarantees near-universal compatibility.
- Geometry-only workflow: If your printing workflow requires only the mesh (triangular surface), STL is the simplest and most portable choice.
- Sharing and archiving: For many users, STL files remain the “common denominator” format that can be shared or archived without concerns about color or material data.
How reaConverter Handles 3MF Input
When you open a 3MF file in reaConverter, the software extracts the geometry of the model. Additional information such as:
- colors
- textures
- materials
- print profiles
- metadata
…is intentionally ignored, ensuring a clean, geometry-only workflow for STL export.
Supported geometry in 3MF
reaConverter interprets the following geometry types:
- Triangles
- Cylinders (converted to triangular mesh)
- Spheres (converted to triangular mesh)
If the 3MF already consists purely of triangles, conversion is straightforward.
If cylinders or spheres are present, reaConverter will tessellate them into triangles during the conversion.
Level of Detail (LOD): Controlling Mesh Quality
When converting curved surfaces (such as cylinders or spheres), reaConverter allows you to control the precision of the output mesh using: Loading settings → 3D formats loading settings → Level of Detail
This setting influences how finely curved shapes are tessellated.
- Higher Level of Detail
- More triangles
- Smoother curves
- Larger STL file size
- Best for visual precision or small curved objects
- Lower Level of Detail
- Fewer triangles
- More faceting on curves
- Smaller STL files
- Useful for rapid prototyping
If the source 3MF contains only triangles, this setting will have no effect, as no tessellation is needed.
How to Convert 3MF to STL in reaConverter
Follow these steps:
1. Add your 3MF files
Drag and drop files into reaConverter, or use the “Add Files” button.

Batch conversion is fully supported.
2. Adjust 3D format loading settings
Go to:
Menu → Loading Settings → 3D Formats Loading Settings → Level of Detail
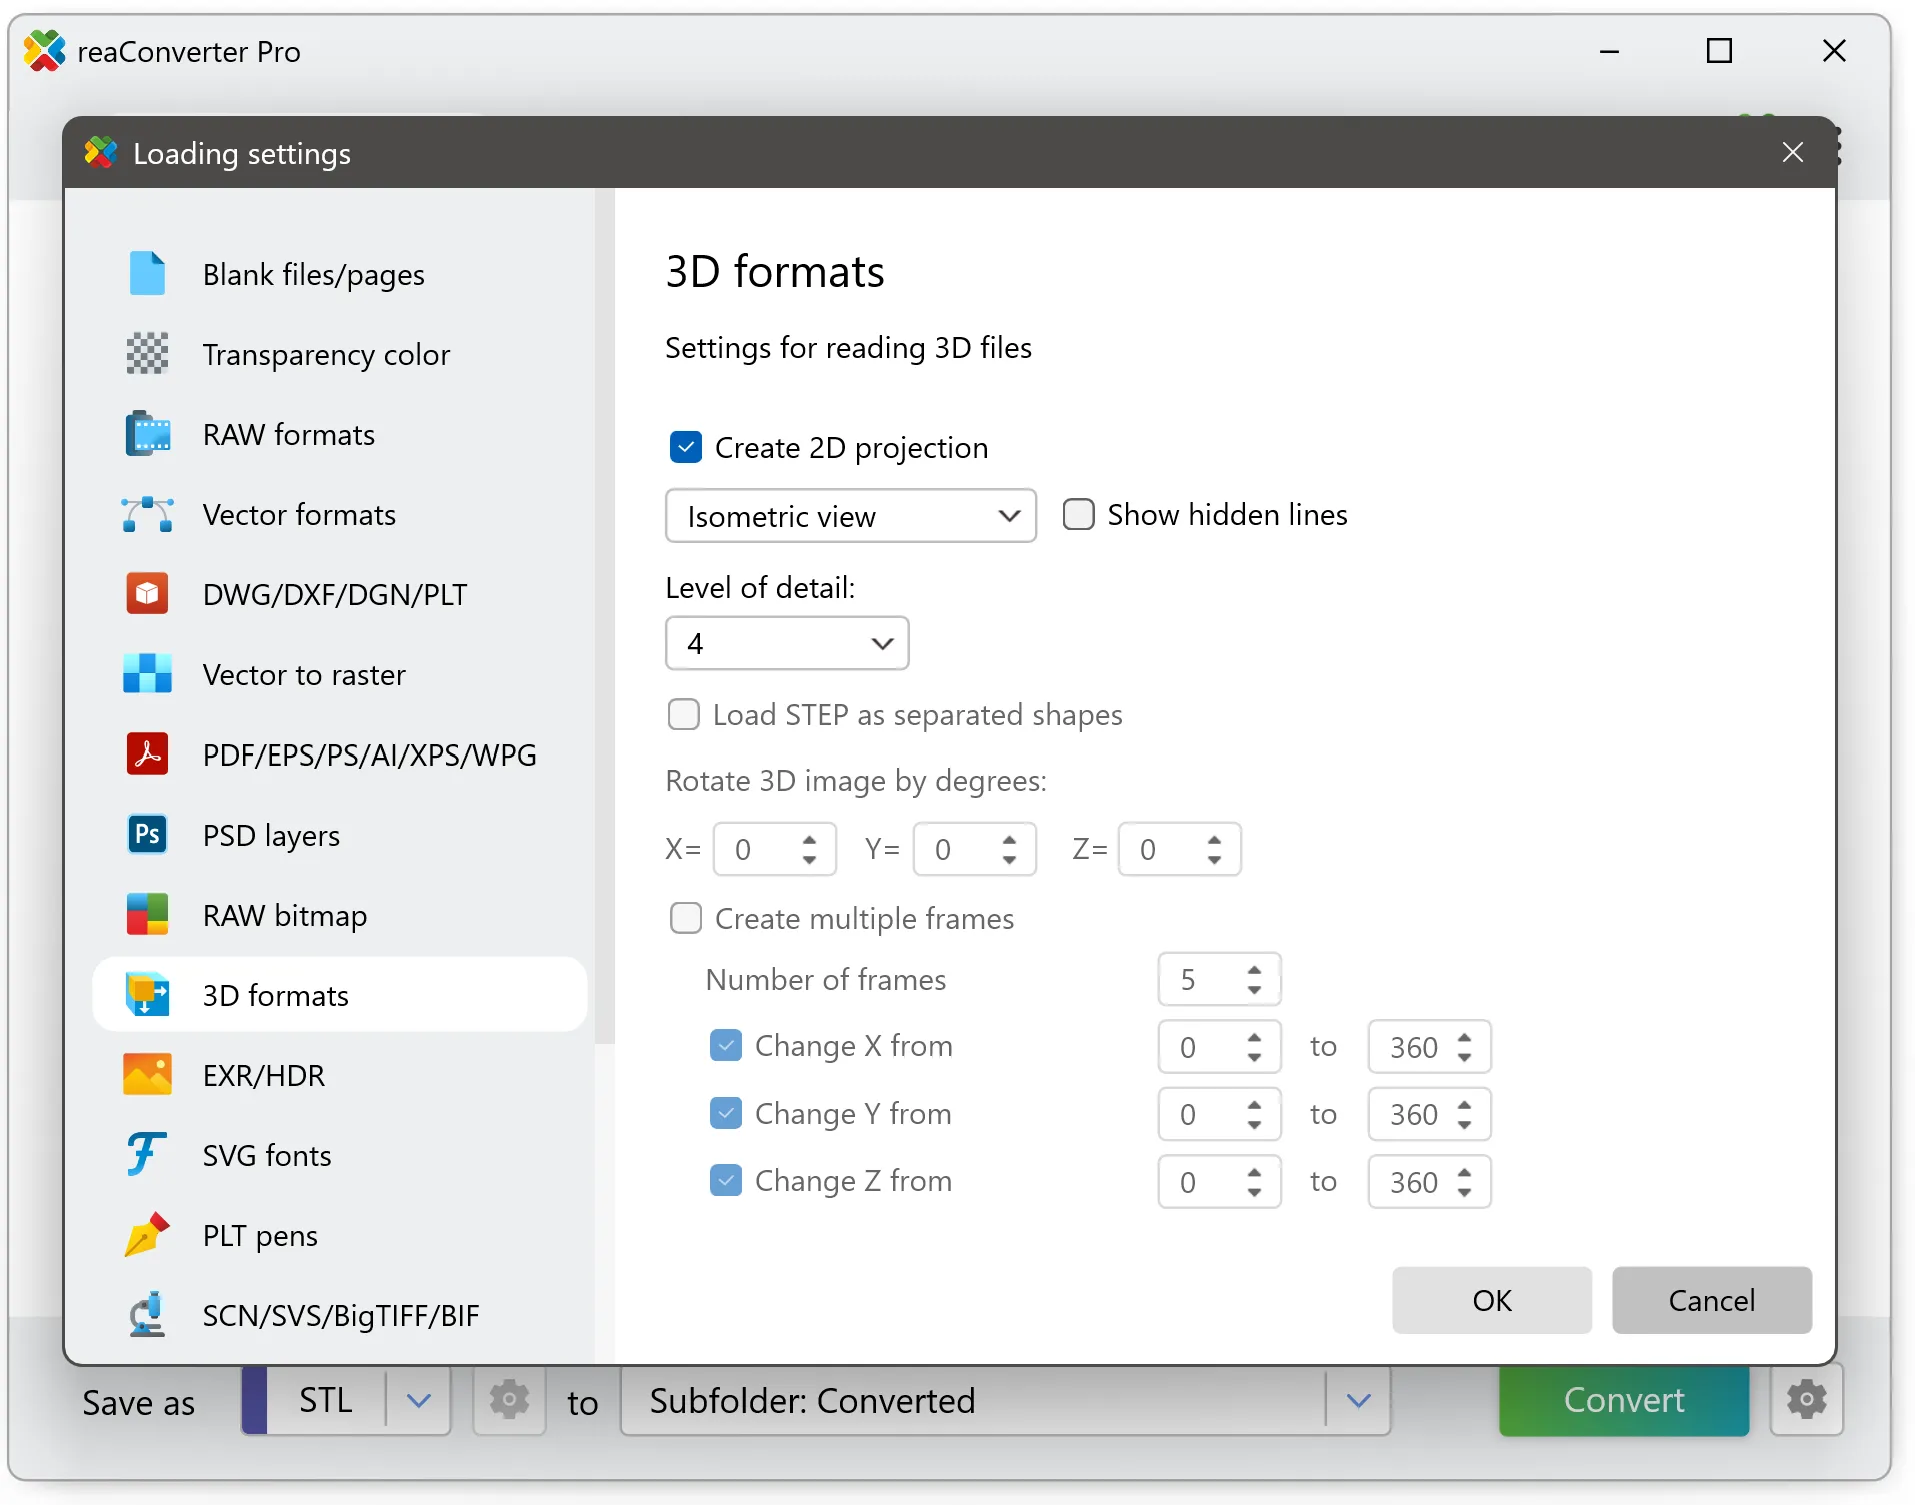
Choose the detail level appropriate for your model:
- Low detail 1-3: Creates simplified models, perfect for quick previews, protecting design details, or reducing file sizes.
- Medium detail 4-5: Balanced quality for most general purposes.
- High detail 6-7: Maximum precision for manufacturing, detailed 3D printing, or when you need every curve and surface captured accurately.
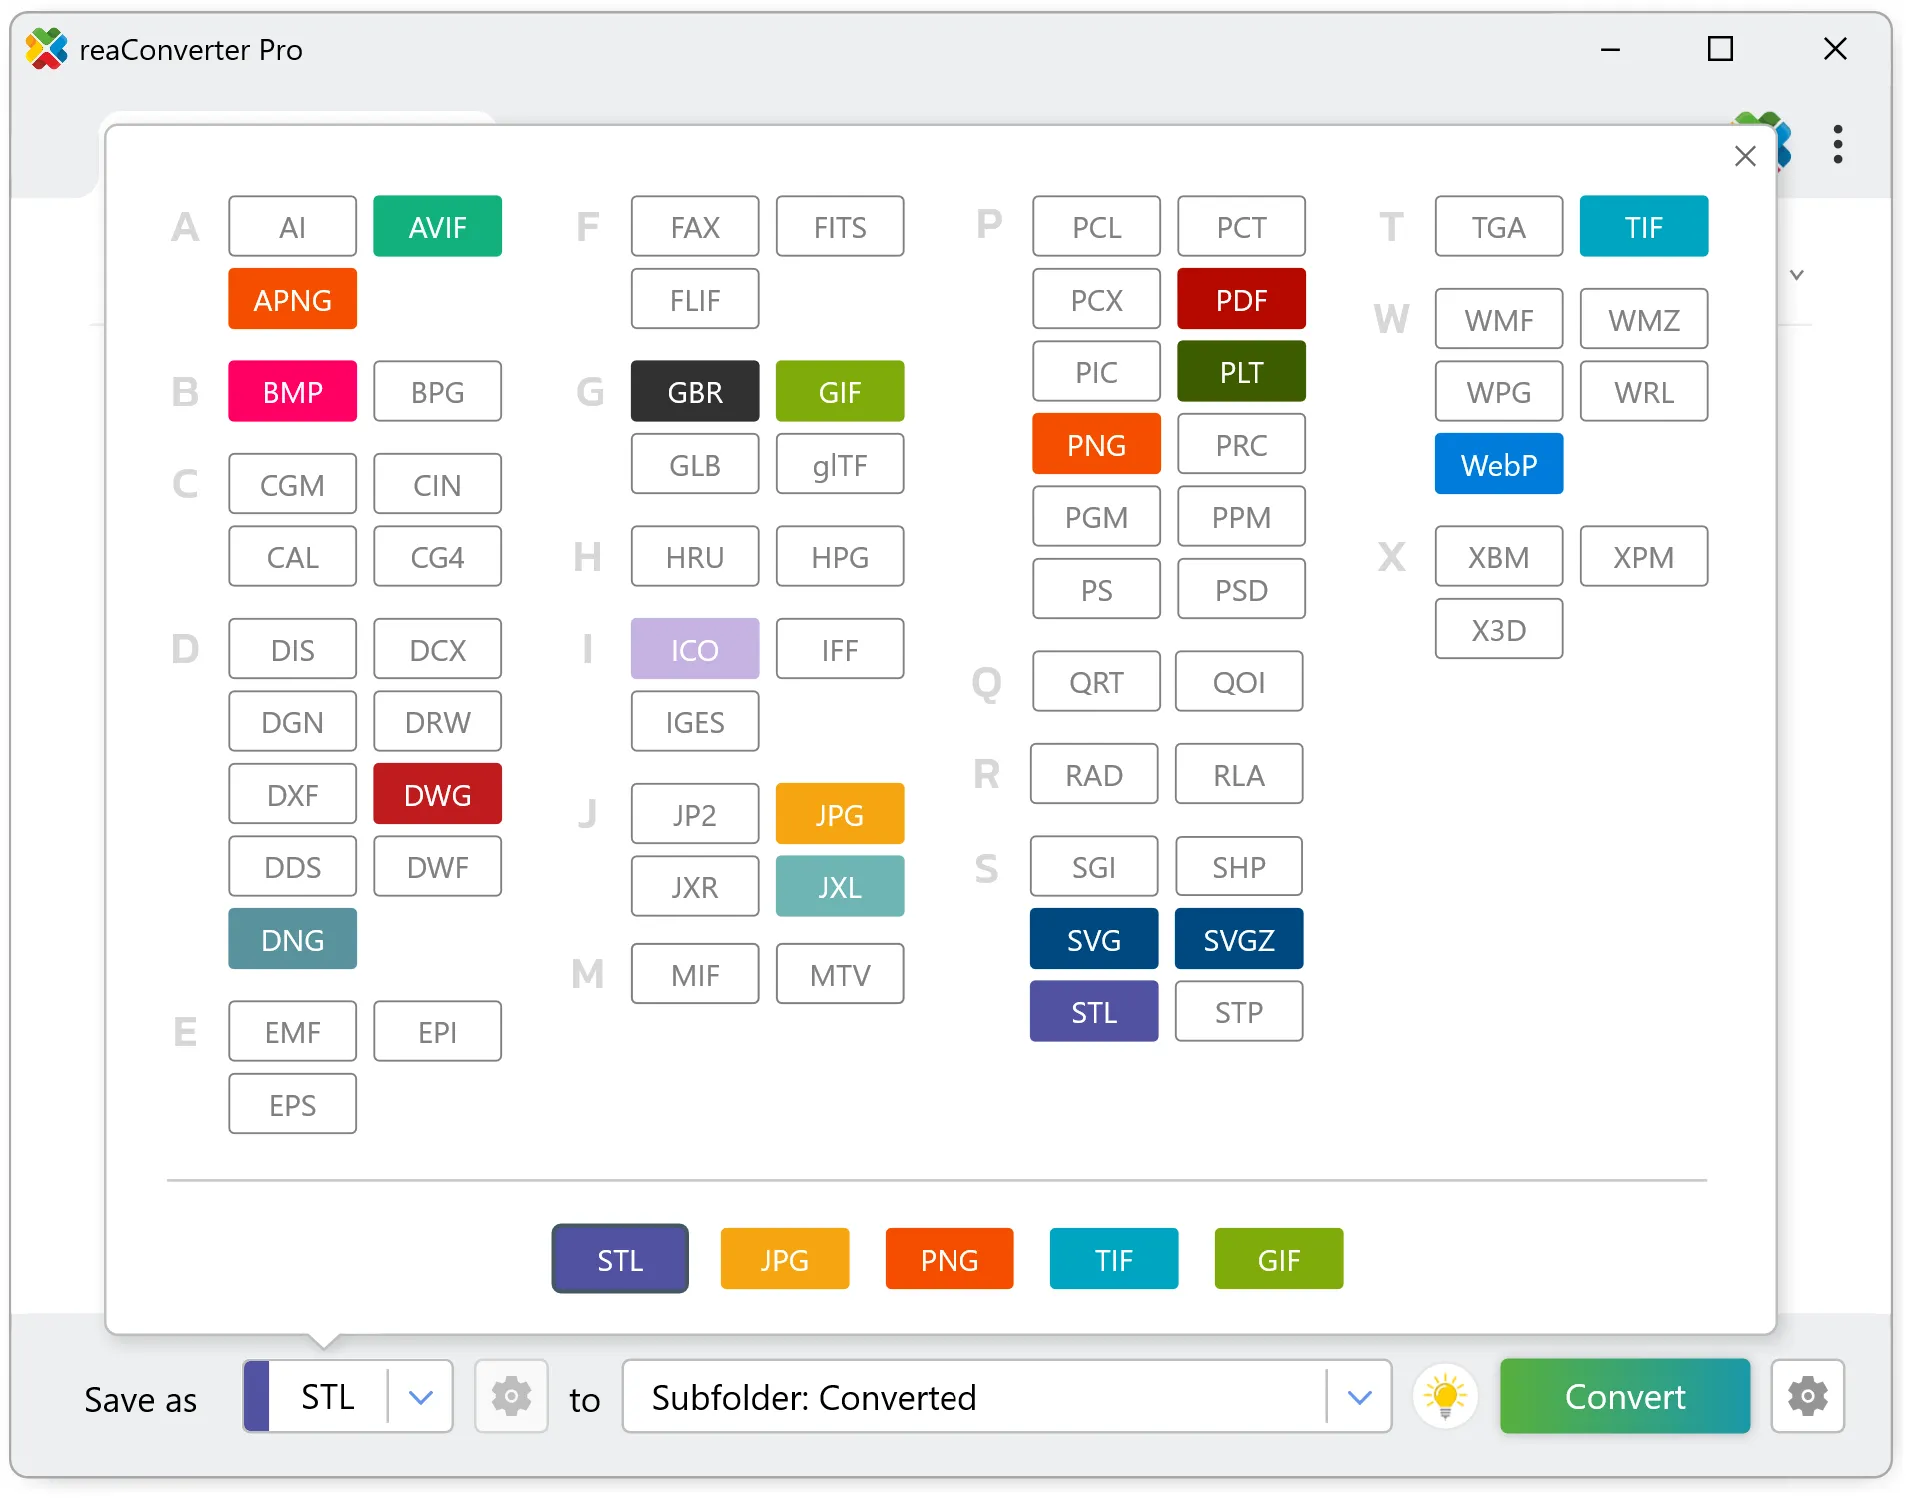
3. Select the output format
On the “Save As” panel, choose STL.
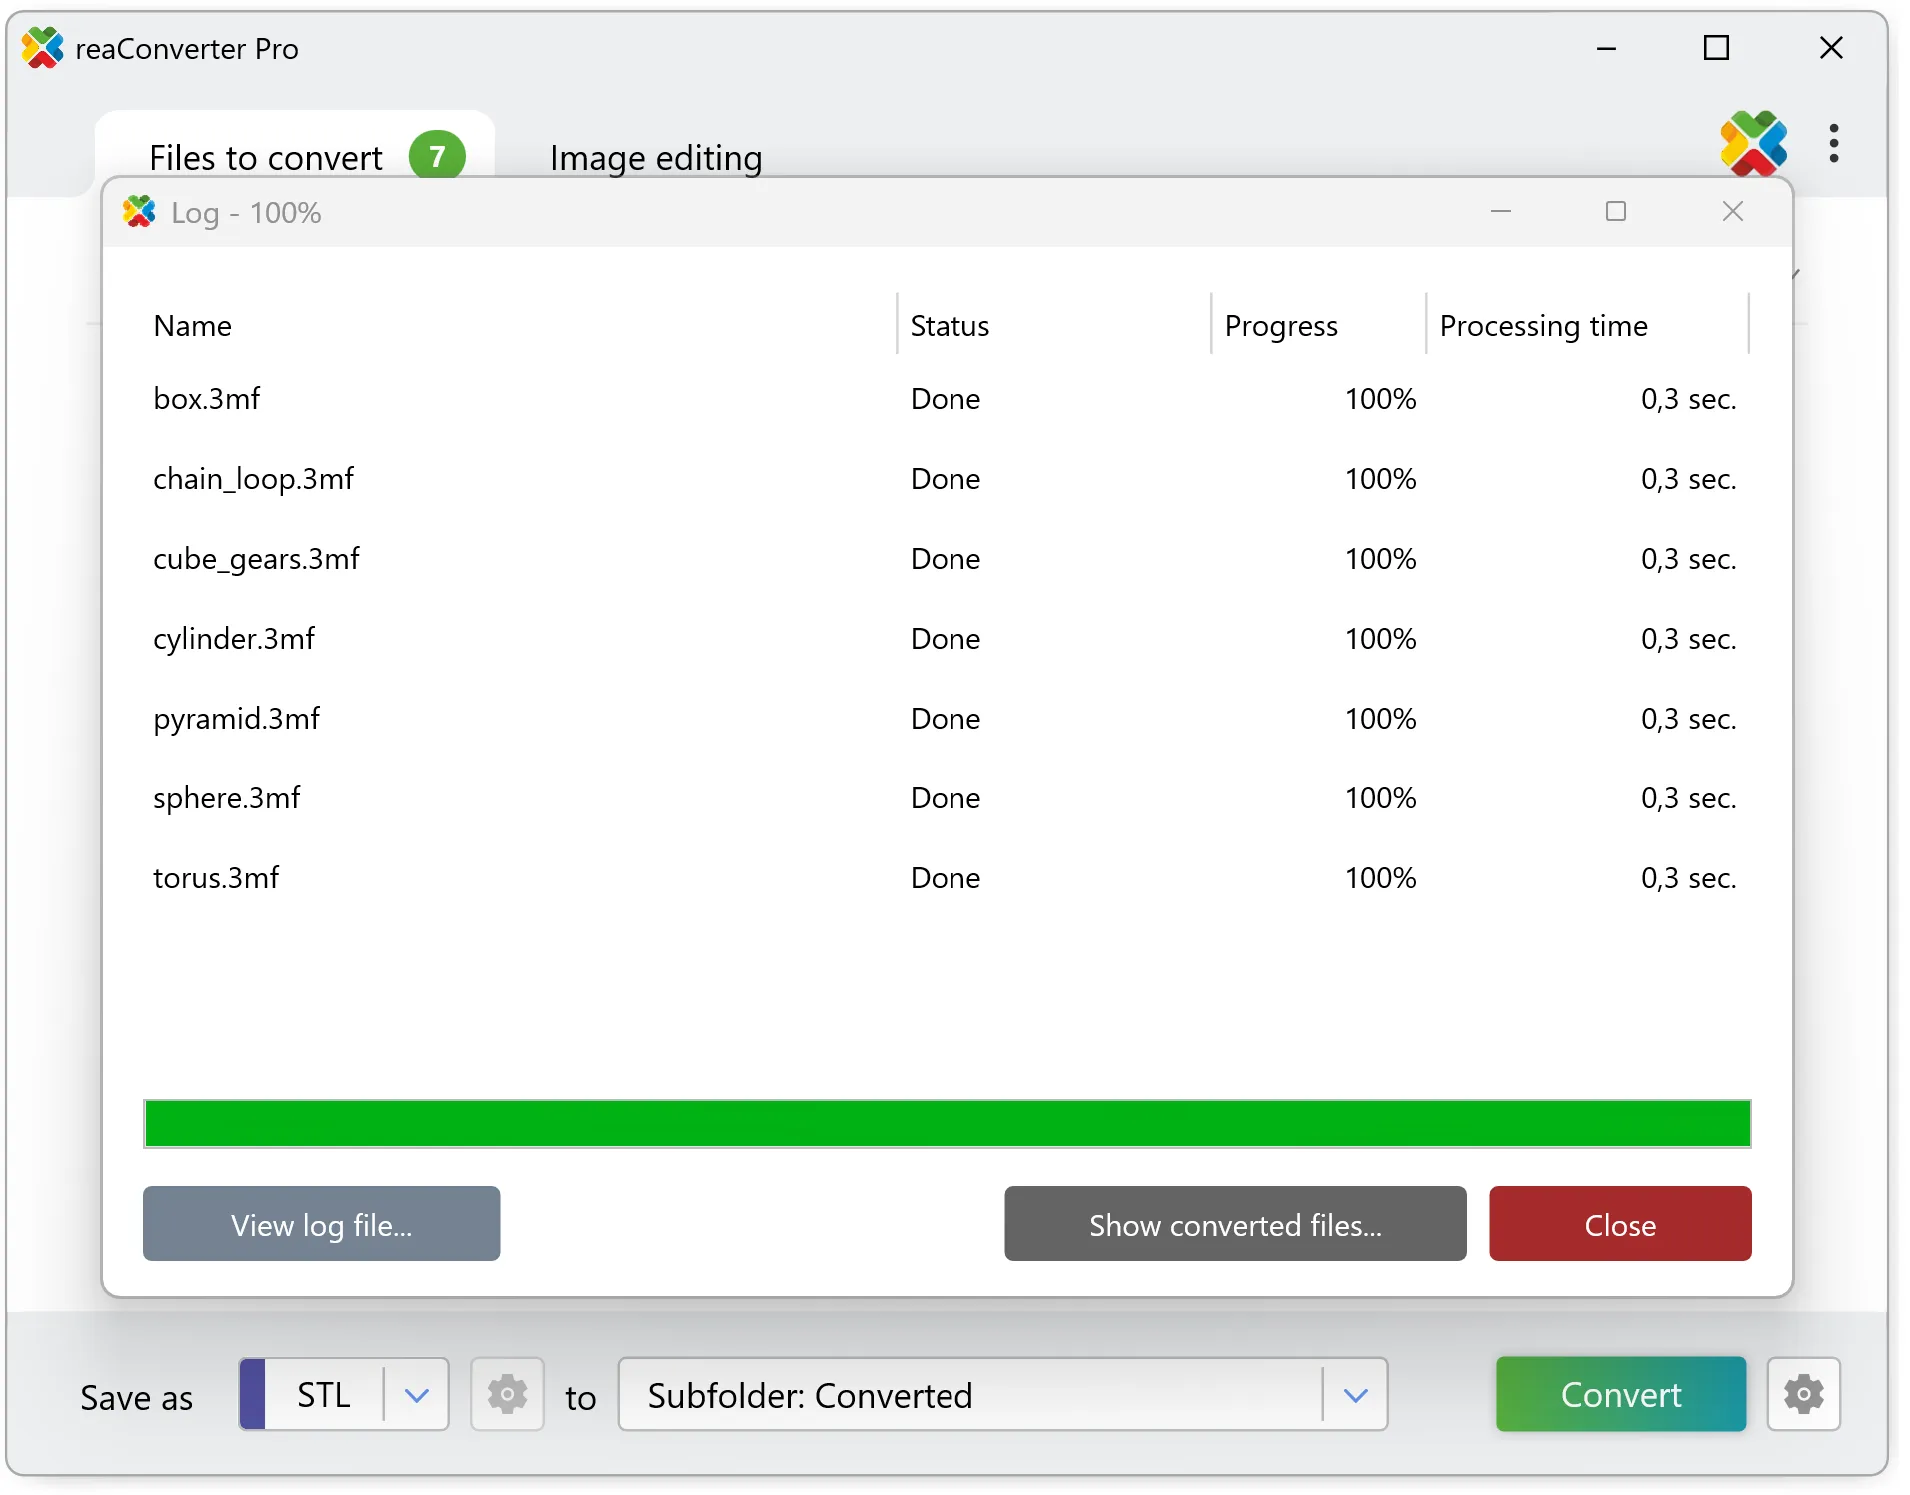
4. Start the conversion
Press Convert and wait for reaConverter to generate STL files.
3MF to STL conversion workflow can also be automated using:
Pros and Cons of 3MF → STL Conversion
Advantages
- Maximum compatibility with 3D printers and slicers
- Clean geometry-only export
- Flexible detail control during tessellation
- Batch processing and automation via reaConverter
Limitations
- Loss of non-geometric data (colors, textures, materials)
- High LOD settings may produce large STL files
- Low LOD may result in faceted curves or loss of smoothness
Best Practices for High-Quality STL Output
- Choose a balanced Level of Detail for your specific model geometry.
- Visually inspect the STL after conversion to ensure surface smoothness.
- For production workflows, keep a record of which LOD level works best for different object types.
- Use Watch Folders to automatically process incoming 3MF files with predefined settings.
- If your slicer includes STL repair tools, run a quick validation of the mesh before printing.
When You Should Keep the File as 3MF
Although STL is more widely supported, you should avoid conversion when:
- You need to preserve color, texture maps, or material assignments
- Your printer or slicer natively supports 3MF
- You are working with workflows where metadata or print settings must remain intact
In these cases, 3MF is the superior format.
Conclusion
Converting 3MF to STL using reaConverter is an efficient and reliable way to prepare 3D models for printing on devices that do not support 3MF. By adjusting the Level of Detail, you can achieve the ideal balance between surface accuracy and file size. Whether you’re processing a single model or automating large-scale batch conversions, reaConverter provides a powerful toolkit for generating clean, ready-to-slice STL files.