
A step-by-step guide to turning reaConverter Pro into your fastest “File-Conversion-On-Demand” button.
Why bother with the context menu?
Windows 11 slimmed its right-click (context) menu and hides many third-party options behind “Show more options.” That second click slows you down — especially when you’re batching dozens of images. reaConverter Pro 8 solves the problem by wiring itself directly into the modern Windows 11 menu, so one click launches an instant conversion using your favorite preset.
If you still see the older two-step experience, Microsoft’s design simply tucks extra items under the submenu; you can always click Show more options to reveal them.
1. Install or update reaConverter Pro
Download the latest build (v2025 or later) and complete installation. During setup, reaConverter registers its shell extension that powers context-menu actions.
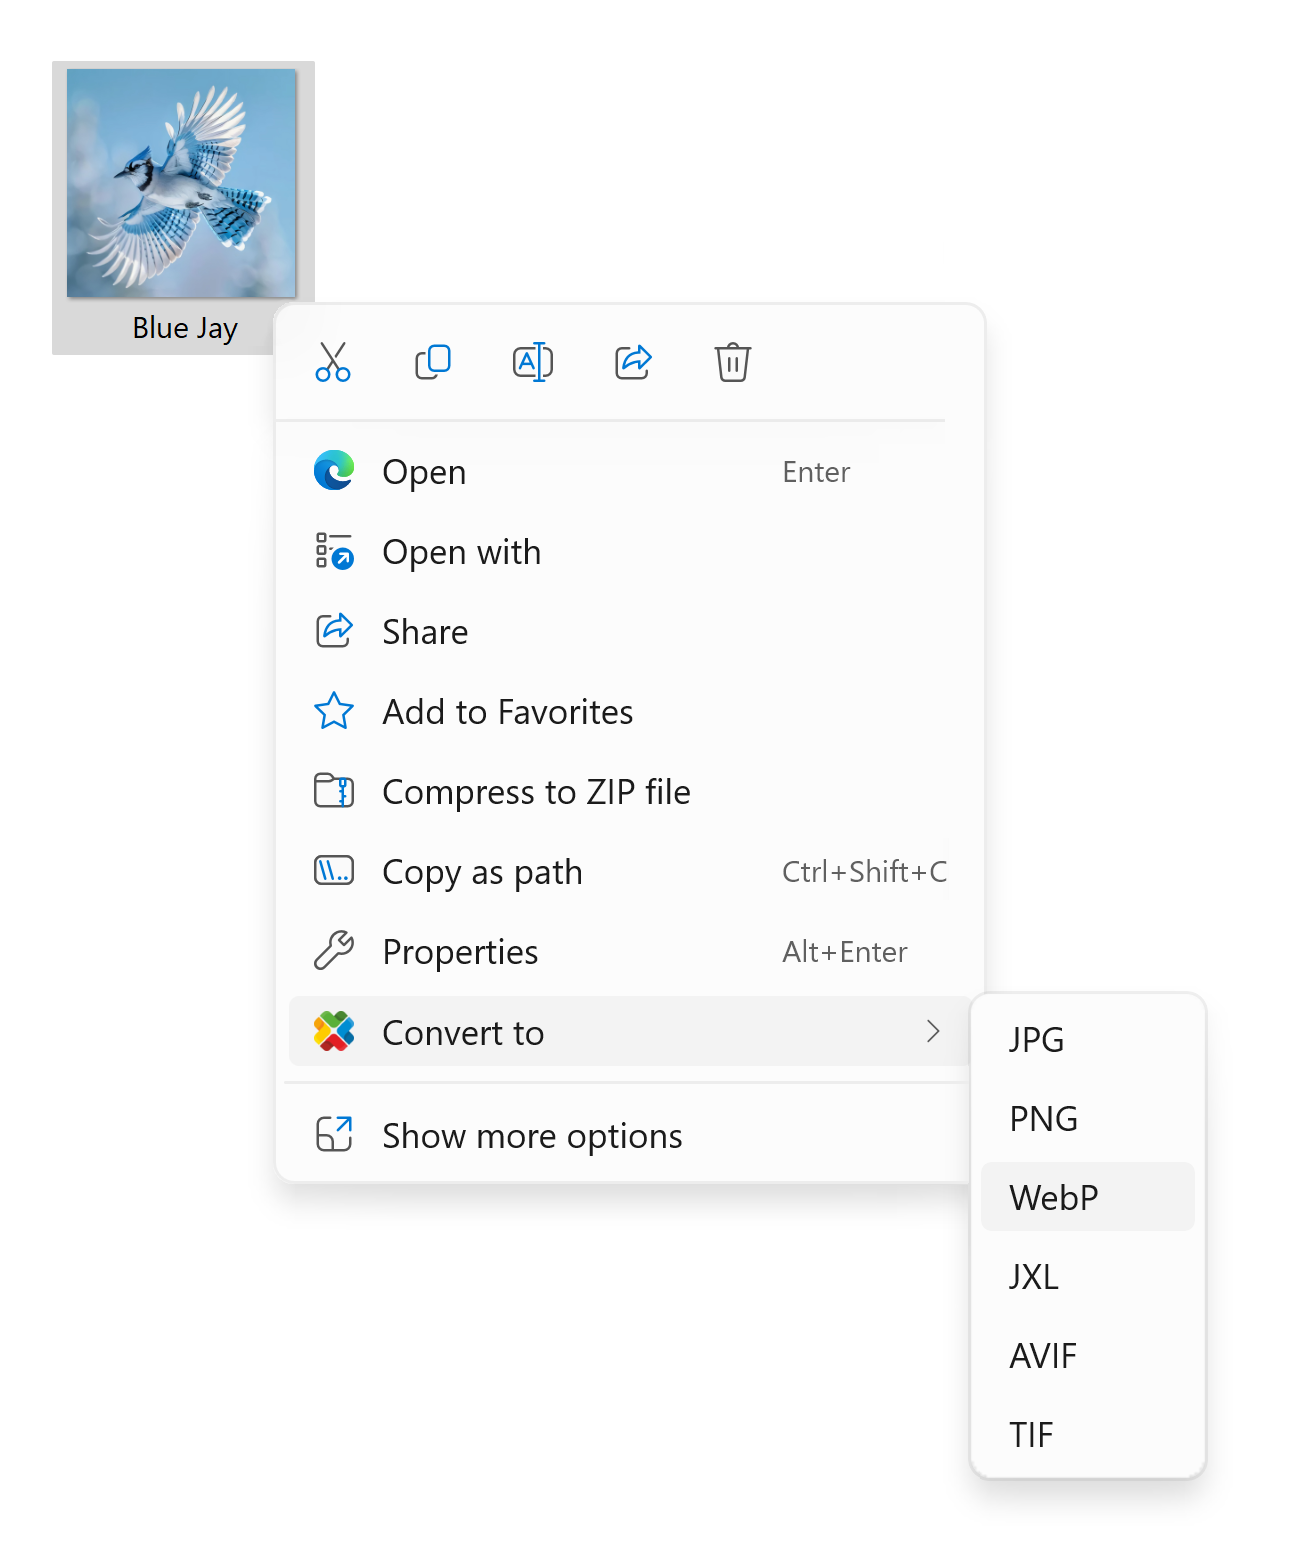
2. Enable the Windows 11 context-menu entry
- Open reaConverter Pro.
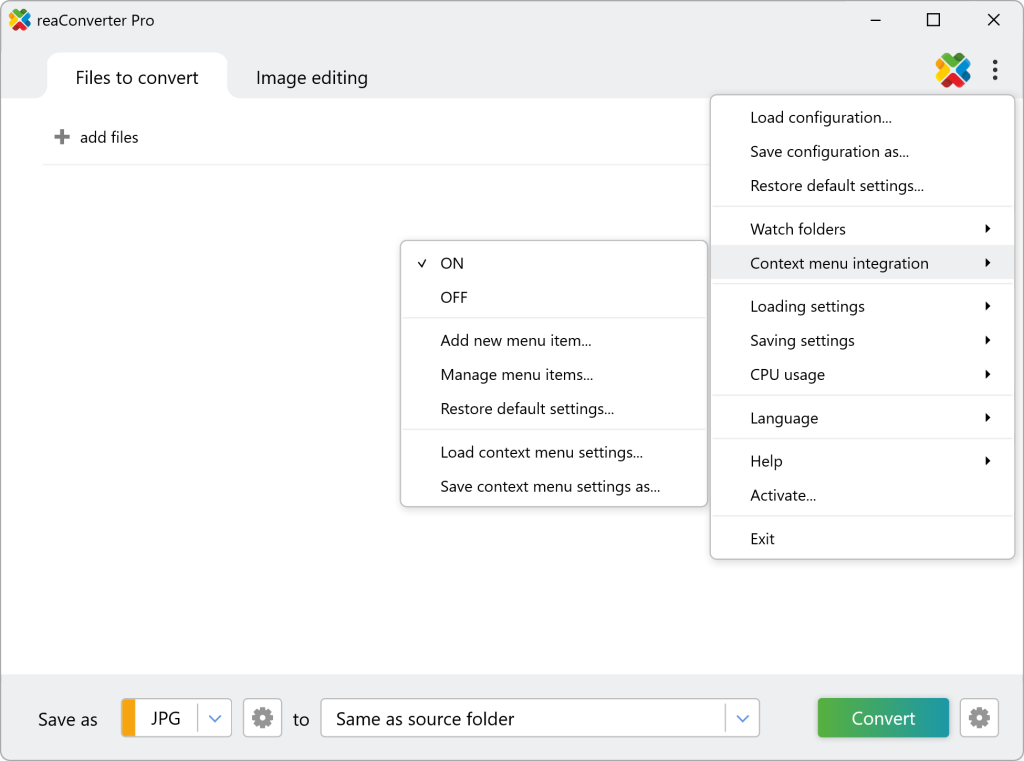
- Click the ☰ Menu button (top-right) → Context menu integration.
- Slide Integration to ON. That’s it — the “Convert with reaConverter” item now appears whenever you right-click a supported file.
Tip: Explorer keeps shell extensions cached. If the new item doesn’t appear immediately, restart File Explorer or sign out and back in.
3. One-click conversions in action
- Select one or many files (or an entire folder) in File Explorer.
- Right-click → Convert with reaConverter.
- A small progress window flashes — conversion happens in the background, and output lands in the folder defined by your preset.
That single click can:
- Turn huge TIFF scans into lightweight, searchable PDFs.
- Re-encode phone HEIC photos to universally compatible JPEGs.
- Flatten DWG drawings into PNG previews.
All without launching the main GUI.
4. Create your own presets ( .cfg )
The default menu item uses reaConverter’s last-saved settings, but power users will want multiple, task-specific presets — e.g., “Resize & Web-Optimize,” “High-DPI Print,” “Watermark + Logo.”
- In the regular reaConverter interface, add every option you need — output format, folder, DPI, color profile, quality, etc.
- Click Save settings → Export configuration and name the file (for example,
WebOptimized.cfg).
The.cfgcaptures all conversion parameters for reuse.
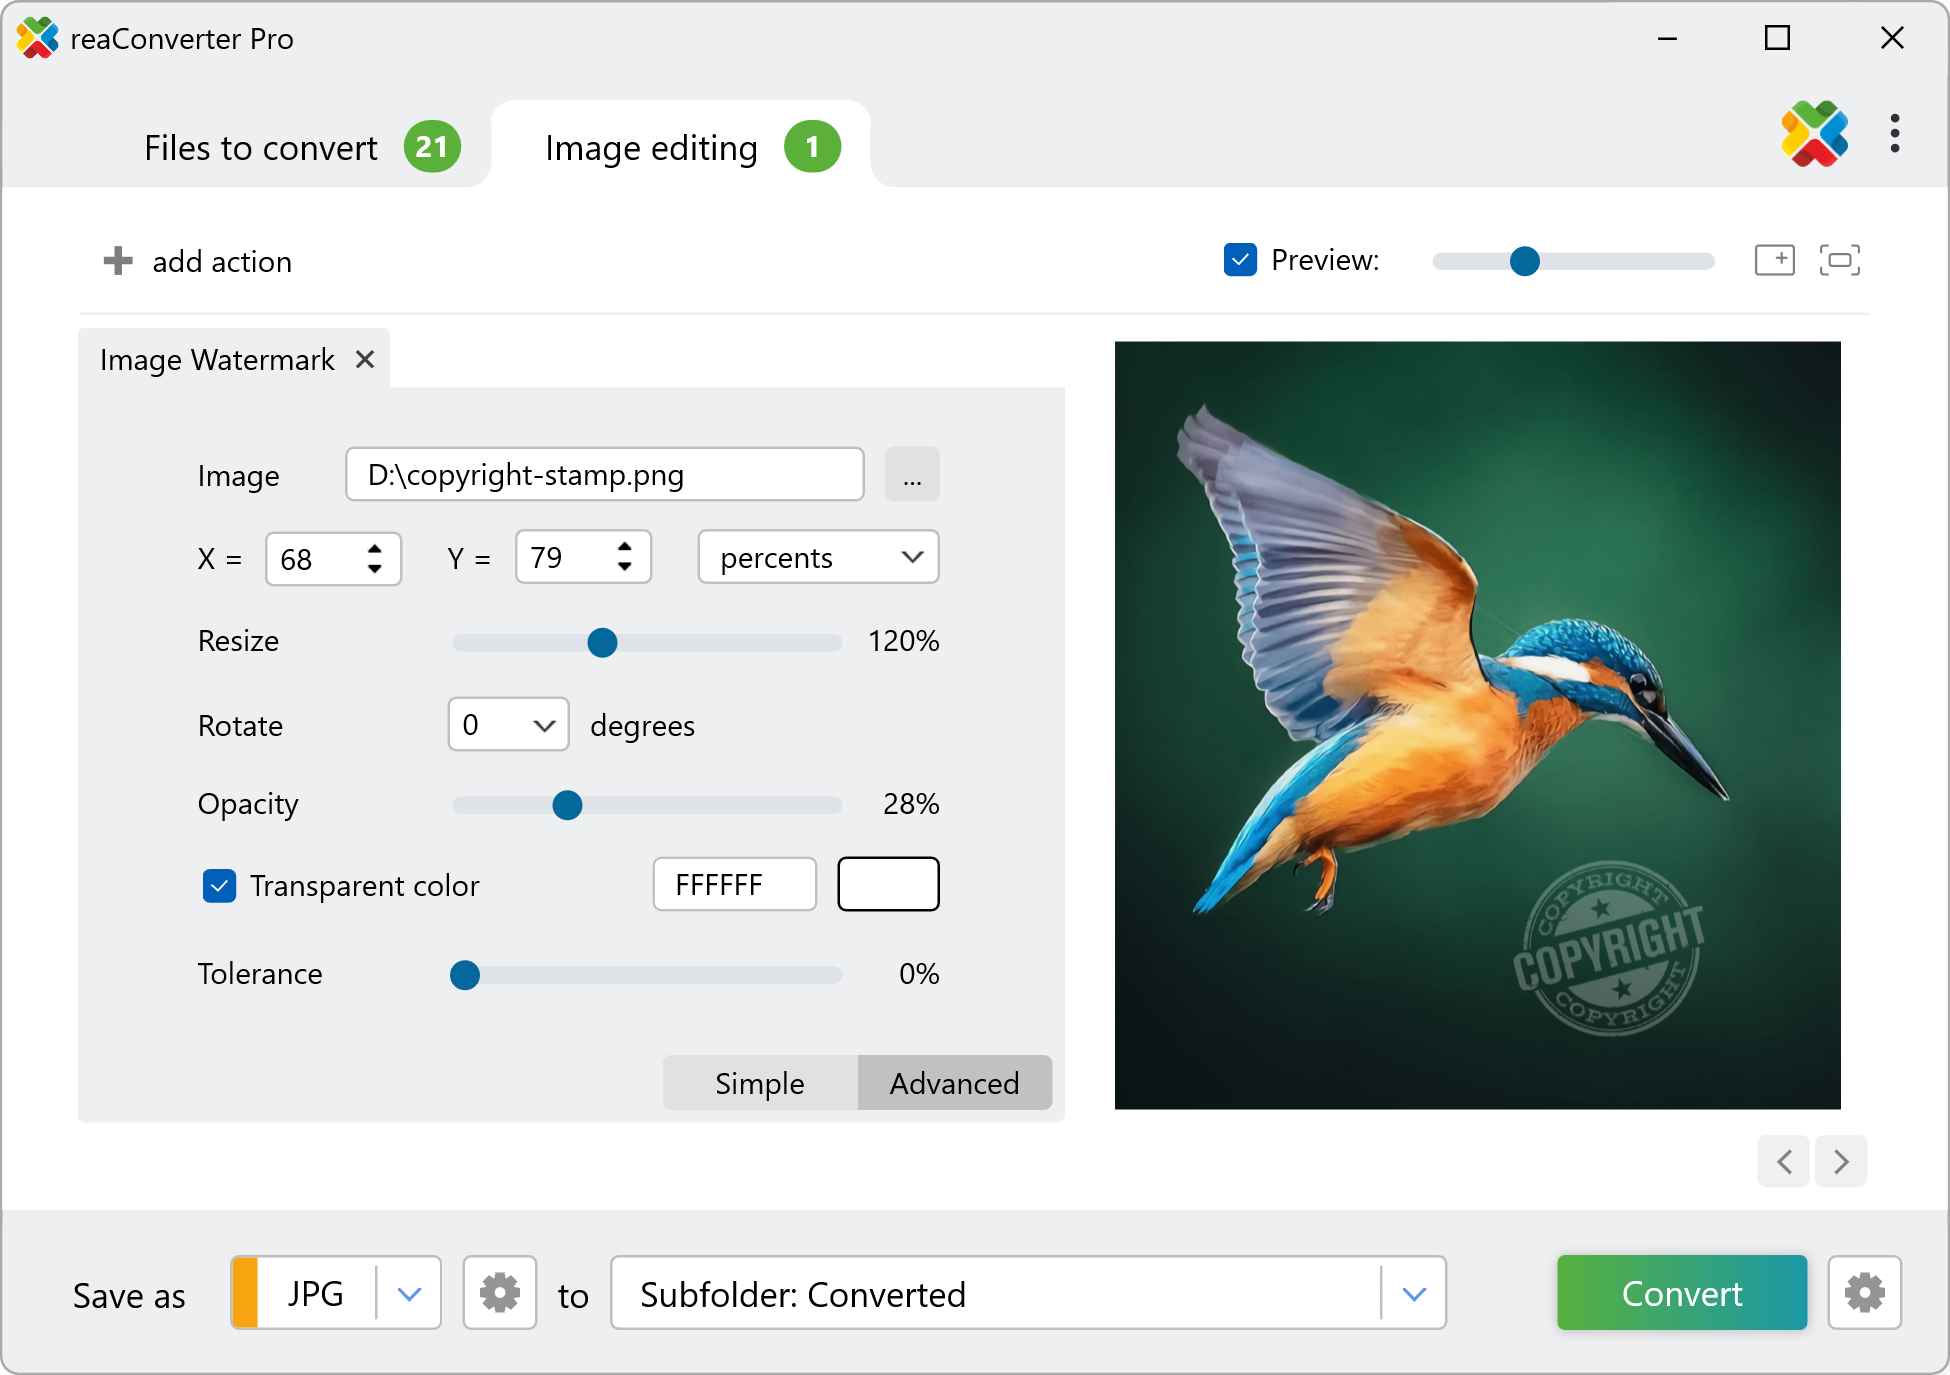
5. Record editing actions ( .act )
Need to watermark, crop, auto-rotate, or tweak color? Stack those edits in the Editing tab and choose Save action list → .act. Each action list can later be paired with any .cfg.
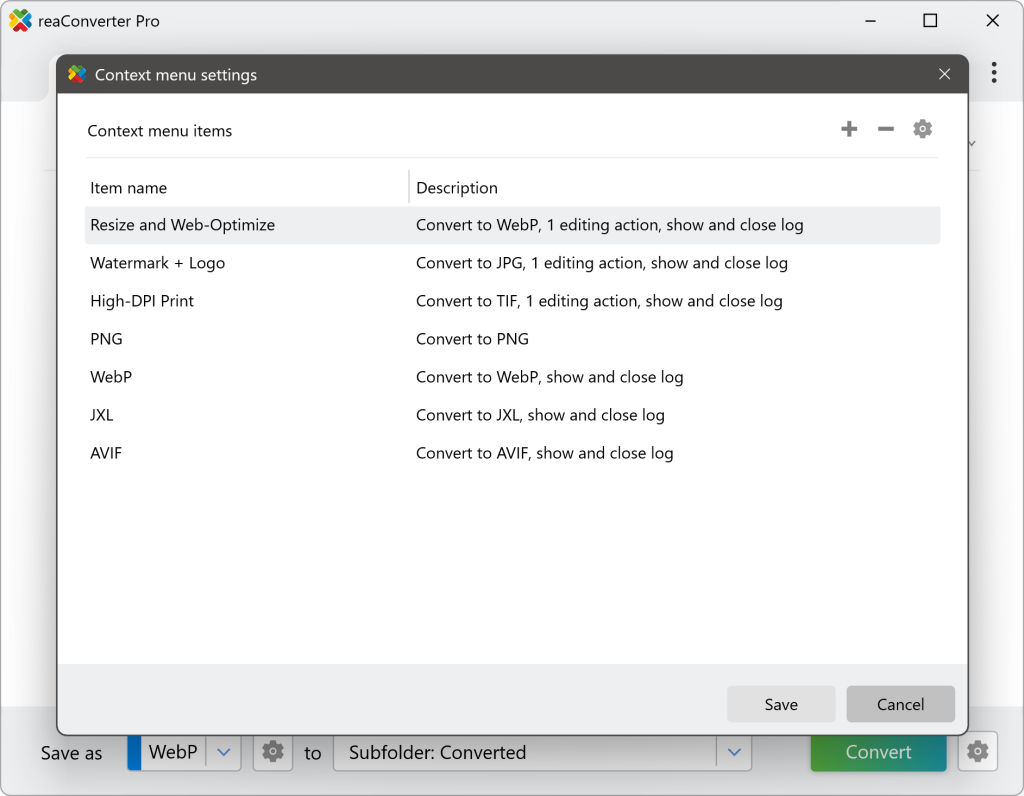
6. Add custom right-click items
Back in Menu → Context menu integration:
| + | Adds a new entry. |
| Name | What you’ll see in Explorer (e.g., “Convert → Web JPEG 85%”). |
| Config file | Browse to your .cfg. |
| Action file (optional) | Attach a .act for watermarking, cropping, etc. |
| Logo icon | Load current settings. |
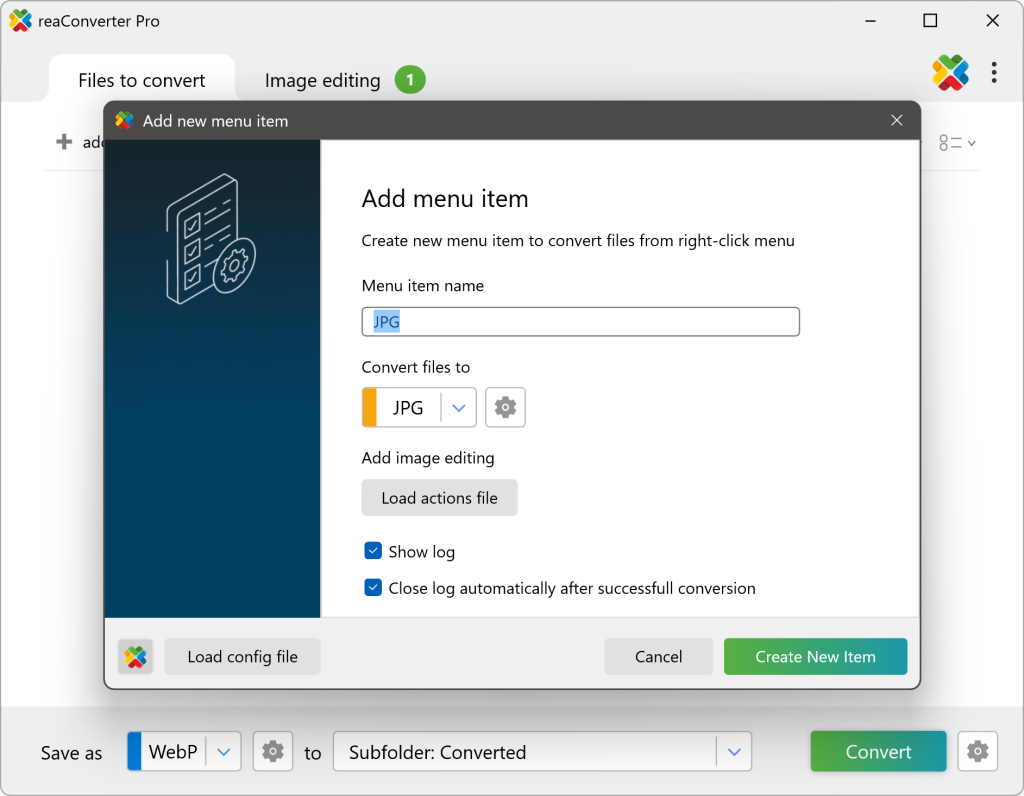
Save, and your bespoke preset appears immediately beneath the main reaConverter item. You can create as many as you like, reorder them, or disable them temporarily without uninstalling.
7. Using it day-to-day
| Scenario | What to do |
|---|---|
| Email-ready screenshots | Right-click PNGs → Convert → Web JPEG 85%. |
| Client proofs with watermark | Right-click photos → Convert → Watermark & Shrink. |
| Flatten CAD for sharing | Right-click DWG files → Convert → PNG Preview. |
| Quick PDF bundle | Multi-select TIFF scans → Convert → Searchable PDF (OCR). |
Each workflow becomes muscle-memory — select, right-click, done.
8. Troubleshooting
| Symptom | Fix |
|---|---|
| Entry missing | Verify integration toggle is ON; reinstall with admin rights; run sfc /scannow if Explorer shell extensions are broken. |
| Duplicates | Remove extra entries in Context menu integration list. |
| Items inside “Show more options” | This is normal on older builds, update your version of reaConverter. |
| Output goes to wrong folder | Edit the linked .cfg and update the Destination folder field. |
9. Power tips
- Dynamic paths: Use variables like
DATE:DD-MM-YYin output names to auto-organize daily exports. - Cloud hand-off: Point the destination to a OneDrive or Dropbox folder; your freshly converted files sync automatically.
- Portable presets: Keep your
.cfg/.actfiles on a USB drive — plug in, import, and your presets follow you to any PC.
Wrap-up
reaConverter’s Windows 11 context-menu hook turns file conversion from an attention-stealing task into a single click. Combine smart presets with modern right-click integration and you’ll never again open a bulky converter window for routine jobs — your workflow stays friction-free, and your time stays yours.
Ready to shave minutes off every batch? Flip the integration switch, build a couple of presets, and right-click your way to instant results.