
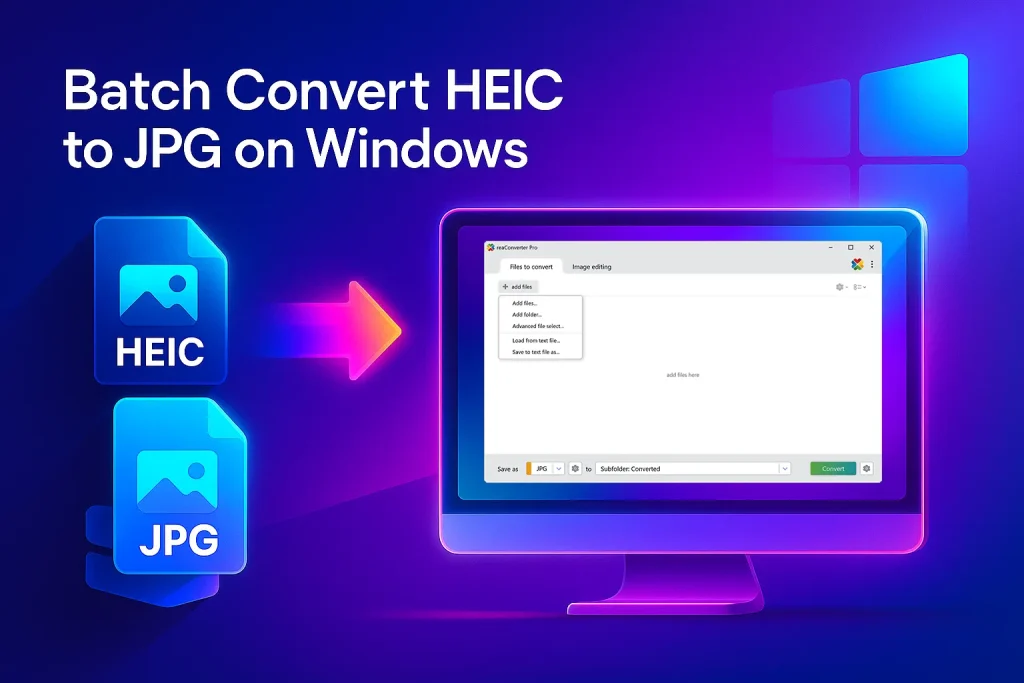
Batch-convert dozens of iPhone HEIC photos to JPG on Windows 10/11 with free reaConverter Lite. No internet, no ads — just fast, loss-free results.
Why This Guide Beats the Rest (Read This Before You Google Again)
Most “HEIC → JPG” articles push you toward:
- Single-file online tools (slow uploads, privacy worries)
- Microsoft’s Photos app (no batch save, quality loss)
- Paid codecs (still manual, still clunky)
reaConverter, even the free Lite edition — lets you drag-in a whole folder of .HEIC images and spit out full-quality JPGs offline in one click. In this post you’ll learn exactly how, plus pro tips to hit perfect image quality and file naming every time.
Target reader: Anyone with a stack of iPhone photos on a Windows PC — photographers, real-estate agents, social-media managers, or parents off-loading holiday pics.
Table of Contents
- What’s HEIC & Why Convert?
- Download & Install reaConverter Lite (Free)
- Step-by-Step: Batch Convert HEIC to JPG
- Add all your photos
- Pick JPG as the target
- Tweak quality & metadata (optional)
- Choose output folder & naming
- Hit Start and relax
- Video Tutorial
- Advanced Tips for Power Users
- Troubleshooting & FAQ
1. What’s HEIC & Why Convert?
HEIC (High-Efficiency Image Container) is Apple’s modern photo format — great for iPhone storage, not so great for Windows workflows. Some apps refuse to open it; others strip metadata or struggle to export.
Converting to JPEG solves:
- Universal compatibility (opens on any OS, browser, or CMS)
- Easier editing in Photoshop, Lightroom, Paint.NET, etc.
- Simpler printing — many labs & kiosks reject HEIC outright
Batch conversion saves time and keeps EXIF data intact if done right — exactly what this guide will show.
2. Download & Install reaConverter Lite — Fast & Free
- Visit reaconverter.com/free
- Choose reaConverter Lite (100% free, no nags, no watermarks for core formats).
- Run the installer (
≈62MB, no bundled extras). - Launch the program — you’ll see a clean, ribbon-style interface.
Pro-tip: If you later need Watch Folders or command-line automation, upgrading to reaConverter Pro is a one-click license change.
3. Step-by-Step: Batch Convert HEIC to JPG on Windows 10/11
Step 1 — Add All Your HEIC Photos
- Drag-and-drop individual files or an entire folder into the big center pane.
- You’ll see instant thumbnails; double-click any to preview.
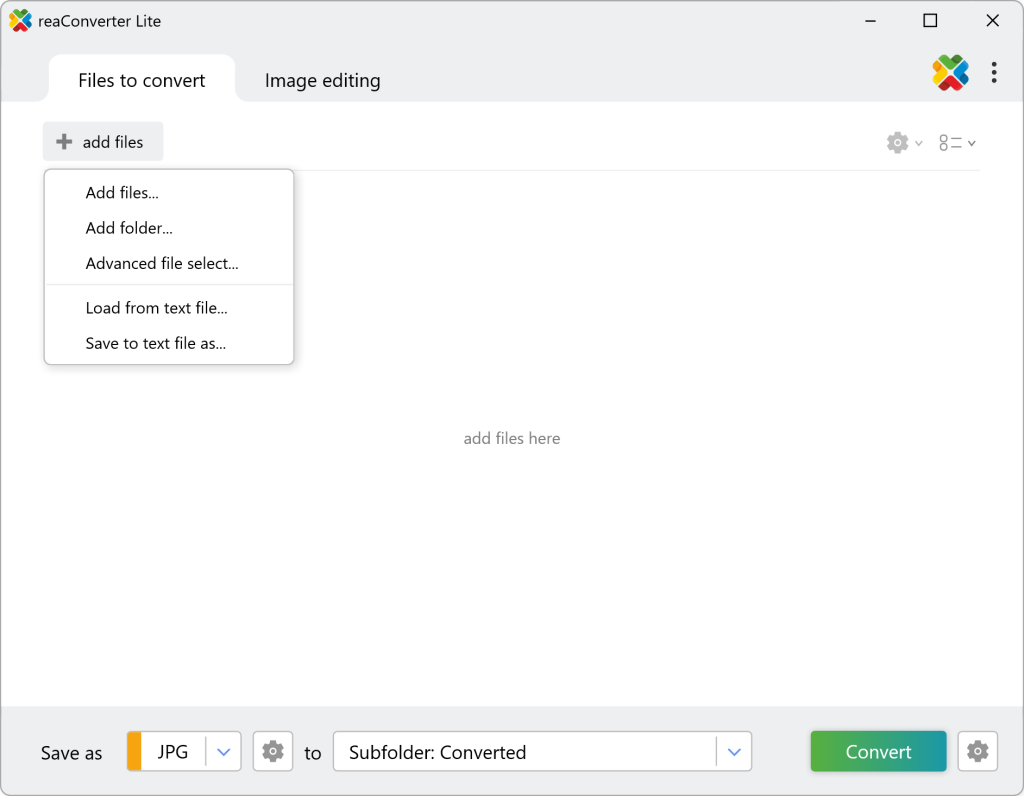
Tip: Need to keep sub-folder hierarchy? Click Saving Settings ▷ File Options ▷ Convert with saving path info before moving on.
Step 2 — Choose JPEG as the Output Format
- At the bottom, click the JPG icon.
- A check-mark appears, confirming JPG is set as the destination.

Step 3 — Tweak Quality & Metadata (Optional)
- Click the tiny gear icon next to the JPG label.
- Quality slider — set 90-100 % for print-ready images, around 80% for web.
- Keep EXIF/IPTC — enabled by default. Uncheck only if file size is critical.
- Color profile — leave on Auto to preserve iPhone’s embedded Display P3; reaConverter will convert correctly.
Step 4 — Select Output Folder & Naming Scheme
- Hit Destination ▷ Change.
- Pick or create your target folder (e.g.,
Pictures\JPG-Exports). - Need custom names? Go Modify Filename ▷ Custom pattern (
[basename]_[counter]). This avoids duplicates and looks tidy.
Step 5 — Click Convert, Job Done!
A progress bar flashes; thanks to multi-threading reaConverter cranks through hundreds of photos per minute on a modern PC. When finished, the Output Manager pops up with a clickable link to your new JPGs.
4 Video Tutorial
5 Advanced Tips & Automation
| Need | Solution in reaConverter |
|---|---|
| Daily imports from iCloud folder | Set that folder as a Watch Folder — HEICs auto-convert the moment they appear. |
| Resize & watermark in the same pass | Add Editing ▷ Resize (e.g., 2048 px long edge) and Editing ▷ Watermark before Step 5. |
| Scripting in backup workflows | Use CLI: cons_rcp.exe -source_folder "C:\Photos" -source_ext heic -dest_path "C:\JPGs\" -dest_ext jpg -jpg_quality 100. |
| Convert HEIC to PNG, TIFF, WebP, AVIF | Just pick another format in Step 2 — same workflow, zero learning curve. |
Troubleshooting & FAQ
Q 1: “Why are my JPGs darker than the originals?”
A: Rarely, some PC apps ignore the embedded P3 profile. Enable ICC Profiles ▷ Apply and remove ICC profile in the Saving settings for universal appearance.
Q 2: “Can I delete the original HEICs automatically?”
A: Yes. Under File Options, tick Delete files after conversion.
Q 3: “Does the free Lite version limit batch size?”
A: No format limits. For ultra-large batches (>10 000 files) or Watch-Folder automation you’ll want Pro, but for everyday use Lite is perfect.
Q 4: “Is there quality loss?”
A: HEIC and JPG are both lossy; converting once at >= 90 % quality keeps differences invisible. Avoid repeated conversions.
Next Steps & Related Guides
- Need faster? See How to convert files with Right-Click.
- Going pro? Automate imports with Watch Folders — tutorial here.
- Optimize for web speed: Try our PNG/WebP to AVIF guide to squeeze every KB.
Ready to reclaim compatibility?
Download reaConverter Lite now and batch-convert your HEICs in under a minute — no sign-ups, no uploads, no hassle.